
Not a single day goes by when I don’t get loads of requests for advice on making macaroons! Don’t freak out! If you follow the recipes attentively, they do work.
Have a look just to help you
Just look at « Miss macaroon bis » Lorette, or Leelooo, Soso, Stéphane and other bloggers who have succeeded. Not to mention all the e-mailers that I’ve personally guided through the recipes—step-by-step at times—and whose mouth-watering photos prove that anyone can make macaroons if they put their minds to it. Props are certainly due to our “Super Julie”, the wiz behind the basic recipe taught at Valrhona’s École du Grand Chocolat. I’ve added a few personal touches, but overall I’m simply a good student.
Mastering the Art of Macaroons
(Formatted to take into account the multitude of questions that are sure to arise!)
Making beautiful macaroons is not difficult, but it is demanding. You’ll need organisation, the right tools, high-quality ingredients and time. You can’t on a whim decide to whip some up as an afternoon snack. Sorry, but making pastry doesn’t work like that!
Macaroons are definitely worth the trouble!

Step-by-step demonstration
The recipe with Italian meringue:
5 days prior: Weigh 2 quantities of 50 g of egg whites that have been separated from their yolks. These should be kept in airtight containers and placed in the fridge (or freezer if you plan on using them later).
2 days prior: Remove the whites from the fridge so they can come up to room temperature.
1 day prior: Weigh 150 g of almond meal, spread it out on a cookie sheet and roast it in the oven for 10 minutes at 150°. Allow the almond meal to cool. Weigh 150 g of confectioner’s sugar (lightly starched if you can find it). Sift the sugar together with the almond meal, cover and set aside. Or, skip all this sifting and toss the lot into your food processor!
Make your ganaches: plain, or flavored to your liking. For a whipped ganache, which I recommend since it’s lighter, let your ganaches cool and add twice their weight in whipped cream (weighed before whipping!) and place them in the fridge. They need a good 24 hours in there to be ready for use.
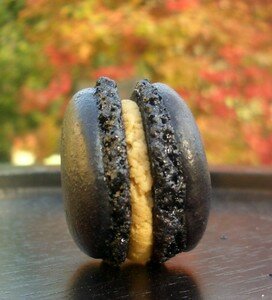
The BIG DAY, morning: Weigh 35 g of sugar for the meringue, add to that 5 g of dehydrated egg whites (not mandatory). Set aside a few drops of lemon juice and the tiniest pinch of salt. You really don’t need either, let’s just say it’s psychological back-up! For the syrup, weigh inside a small boiler 150 g of sugar. Weigh 50 g of water. Cover 3 perforated baking sheets with parchment paper or silicon-lined baking paper, the latter being preferable if you want to end up with macaroon shells that are smooth, cooked evenly, but not hollow. (If you went the 40 g egg white route, 2 baking sheets will do). Get your pastry bag ready, for which you’ll need a 10 mm tip. Have it turned upside down and ready to be filled. Make sure that you have within reach the food colorings you’ve chosen, as well as a small sifter with cacao, black sesame seeds, crushed nuts or spices, or whatever else you plan to use for decorating the macaroon shells.
Last but not least, don’t forget your trusty candy thermometer! For more details and photos, click on the link “Bons Plans”

The BIG DAY, afternoon: Preheat the over to 145° (confection heat if you have the option) and place your three baking sheets inside, each on its own rack as long as they can all fit. It’s certainly okay to cook one sheet at a time.
AND NOW FOR THE BIG MOMENT!
Gently beat 50 g of egg whites with a pinch of salt and 2 drops of lemon juice. When they whites begin to foam, incorporate the sugar in three separate parts.
While you’re doing this, add your 50 g of water to the sugar for the syrup. Place over a medium flame, and stir a bit to dissolve the sugar. Make sure not to stir once the syrup begins to heat.
Place your thermometer in the syrup and program it to go off once the syrup reaches 110° so that you can remove it from the heat that point.
Keep an eye on the egg whites. Speed up the mixer; the meringue should become shiny and firm. Then, gently pour the syrup in a steady stream down the side of the bowl of the stand mixer. Voilà—you’ve made Italian meringue!
Hard part’s over, no need to rush. Continue to beat the meringue for about 10 minutes, or until it is cooled. At this point you can speed up the mixer.
Mix the other 50 g of egg whites with the almond/sugar mixture by incorporating them with a rubber spatula. Add a coloring of your choice.
When the meringue is completely cooled—about 40°—stop the mixer. Take the bit of meringue stuck to the beaters, apply a dab to the 4 corners of each piece of parchment paper or silicone paper so that they stick to the baking sheet while you pipe the shells. Incorporate the meringue to the almond mixture. Starting from the middle, work the spatula from the bottom towards the top. Do this for about 2 to 3 minutes, and you should have a shiny, smooth, pliable, quasi-liquid mixture that resembles magma.
When you lift the spatula, a thick magma-esque ribbon of batter should fall back down in to the bowl. This is the key step of “macaroonnage.” If you haven’t reach this point before forming your shells, they will have a tiny peak at the top instead of rounded cap.
Transfer the batter to the pastry bag and pipe small, evenly-space dollops onto your baking sheet. With the 50 g version of the recipe, I get exactly 100 shells, in other words 50 macaroons total.
You might find it necessary to tap the baking sheets on the counter to ensure that all your shells are smoothed down.
Sprinkle with whatever toppings you have chosen and put the racks in the oven for 13 minutes.
Many recipes call for a 2-hour period of leaving the macaroons out so their crust develops, but I find this unnecessary. Some people swear that this is the key to baking perfect macaroons. I’ll let you decide!
Once you remove the shells from the oven, place the sheets on cooling racks and allow them to cool. They should pop right off the baking sheets without need for coercion. They should be super smooth, with their typical little collar, and baked to perfection.
Whip the ganache—if that is what you are using for a filling—like you would a whipped cream and transfer it to a pastry bag. You’ll need to take each macaroon shell in your hand, and, using your thumb, gently press down on the underside in order to make a slight indentation. This is to ensure that once the shells cool, there is room for the ganache.
Nota bene: This recipe is adapted to my oven, which is extremely reliable and precise in terms of temperature. Since no two ovens are exactly alike, you’ll need to test yours out! One thing for sure: if you have the option of convection heat, no need to play around with wooden spoons to keep the door ajar.
Preservation: Macaroons freeze very well. I prefer to freeze the ungarnished shells, and then fill them 2 days before serving in order for the flavors to have ample time to develop. You can also fill them and freeze them, but in that case you’ll need to add a bit of neutral-flavored honey to the ganache so that is remains soft when frozen. A quick 30 minutes at room temperature and your macaroons are ready to serve!
If you apply yourself and put in a little hard work, your efforts will pay off. Don’t give up! With this recipe, lots of others have made macaroons as good as mine!
I await your feedback: mishaps, successes, photos and questions if you still have any!
Troubleshooting:
The Italian meringue doesn’t firm up
– the shells are hollow underneath – Too much air beaten into the batter during the “macaroonnage”
– shells crack – Unsteadiness while piping the batter – collar doesn’t form, cracks do
– Not knowing your oven : try different temperatures, different baking times
But what type of oven should I use?
A convection oven is without a doubt the optimal choice, but many people succeed in making macaroons with gas or electric ovens, and some have even made macaroons in mini toaster ovens, so don’t despair if you don’t have a convection oven at your disposal!
This article is at times a bit exaggerated and to be taken with a grain of salt, but it has already proven helpful to many.
I recently changed my oven in September and it took me a good month to find the right setting for baking macaroons!
Conclusion:
Mastering one’s oven is indispensable in order to have perfectly formed macaroon shells, including a nice collar, uniform doneness, etc. This implies knowing how many baking sheets you can place in the oven at one time! Don’t give up, hang in there and you’ll get it eventually!

Afterword:
It’s been two years since this recipe was first posted, and obviously lots of things have evolved. For instance, the use of Italian meringue is not all-important, and in fact equally good results can be had by using a basic meringue (see Recipe Summary). For beginners, the basic meringue method is both faster and relatively fool-proof. For a more complete guide to making macaroons, and for more helpful tips and tricks, check out my book :Solution Macarons.. [1].